You know that moment when you're standing in your garage, dreaming about practicing your swing year-round? Setting up a golf simulator enclosure doesn't have to be the nightmare you've been imagining. With the right guidance, you can create a space that feels just like a lush green fairway. As you explore various options, be sure to dive into golf simulator enclosure comparisons to find the perfect fit for your needs and budget. Soon enough, you'll be improving your swing with every practice session, right from the comfort of your home.
Here's the deal - creating the perfect practice space boils down to just three straightforward decisions.
Most folks get totally overwhelmed when they start researching simulator setups. They dive into forums, watch endless YouTube videos, and end up more confused than when they started. Sound familiar? The enclosure selection process trips up even the most dedicated golfers because there's a flood of options and technical specs that'll make your head spin.
Listen, you can stop stressing about this right now. What you need is a clear path through all the noise - someone to break down exactly what matters when you're choosing an enclosure that'll let you rip a driver without worrying about taking out a ceiling fan.
Think of it this way: your enclosure needs to handle three things. First, it's gotta give you enough room to make a full swing without feeling cramped. Second, you need comfort - nobody wants to practice in a claustrophobic box. Third, the visual setup has to feel realistic enough that you're actually improving your game, not just whacking balls into a tarp.
The beauty is, nailing these three elements isn't rocket science. You don't need an engineering degree or a massive budget. You just need someone to walk you through what actually matters versus what's just marketing fluff.
We've taken everything that matters about simulator enclosures and boiled it down to the essentials. No fluff, no unnecessary complications - just the straight facts about what'll work for your space and your game.
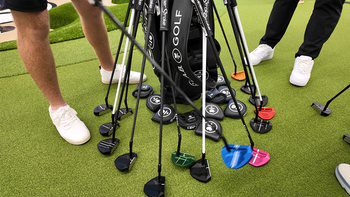
Assess the Dimensions of Your Golf Room
Look, before you drop serious cash on a golf simulator, you're gonna need to measure your space, and I mean really measure it. Don't just eyeball it and think you're good to go. Consider the height of your ceiling as well; how tall should your simulator room be? You want to ensure there’s enough clearance for your swing to avoid any mishaps. Taking the time to get these dimensions right will save you headaches and money in the long run.
Here's the deal: Get yourself a measuring tape and let's figure out what you're working with. Even if you swear you know your room's dimensions, humor me and check again. Actually, measure twice just to be safe.
Let's start with your ceiling height. You'll want to check from floor to ceiling in multiple spots; sometimes, ceilings aren't as level as you'd think. Watch out for stuff hanging down, like lights or ceiling fans, that'll mess with your swing path.
Your ceiling should be at least 9 or 10 feet high. Sure, shorter folks might get away with 8-foot ceilings, but trust me, you'll feel cramped. Nobody wants to be thinking about smashing their driver into the ceiling mid-backswing.
Next up is room width, that's the side-to-side measurement. You're shooting for about 14 feet here. Got a lefty buddy who's gonna use your setup? You'll definitely need that full width so both of you can swing without worrying about putting a club through the drywall. Got less than 14 feet? You could cheat your hitting position a bit off-center to give yourself more room where you need it.
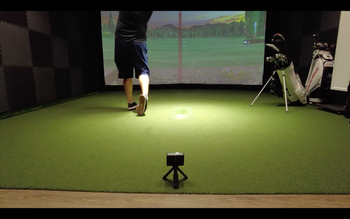
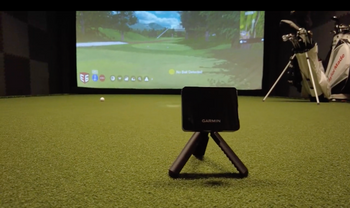
For room depth, figure out where you want your screen and measure from that wall to the opposite one. You're looking at 18 feet minimum for the whole setup. Here's why: You need space behind the enclosure, plus you should be standing 10-12 feet back from the screen — any closer and you're asking for a golf ball to bounce back and nail you. Using one of those radar launch monitors? Add another 6-8 feet behind where you'll stand so it can track your ball properly.
Now for the fun part, grab your driver and head to where you think you'll be hitting from. Start with some super slow practice swings. We're checking if you can make a full swing without destroying anything expensive.
If those slow swings went okay, gradually pick up the pace until you're taking your normal cuts. Here's the thing, though, it's not just about physically having the room. If you're worried about clipping the ceiling on every swing, you're gonna develop some funky compensations that'll mess up your real golf swing. You need enough clearance that you can rip it without that little voice in your head saying, "watch the ceiling!"

Factor in Buffer Zones and Player Comfort
So you've got your room dimensions figured out and checked that you can take a full rip with your driver without punching through drywall. Smart move. But here's where most folks mess up - they forget about leaving breathing room around their simulator cage.
Think of it like this: you wouldn't park your car with the bumper touching the garage wall, right? Same deal here. You're gonna want some cushion between your setup and the actual walls of your room.
Let's talk specifics. Up top, give yourself at least 2-3 inches between your enclosure's ceiling and your actual ceiling. Trust me on this one - trying to wedge that thing into place without any wiggle room is like trying to parallel park a truck in a compact spot. Not happening.
For the sides, same story. Keep 2-3 inches of clearance on each side. Why? Because when you pure one (or more likely, when you don't), that ball's gonna bounce around like a pinball machine. Without that gap, you're looking at dented drywall and possibly some explaining to do with your significant other.
Now here's the big one - the back wall needs serious respect. We're talking 12-16 inches of space behind your impact screen. That screen's gonna flex when you smoke a 7-iron into it, and if your wall's right there? Let's just say home repair isn't cheap these days.
Your height and how well you actually play matter more than you'd think. If you're pushing 6'3" or you've got one of those Jim Furyk loop swings, you'll need extra headroom and elbow room. No shame in that - we all swing differently.
For those of us still working on breaking 90 consistently, going deeper is your friend. I'd say 10 feet minimum front to back. Those thin 5-foot setups? They're fine if you stripe it every time, but let's be real - that topped 60-degree wedge is gonna launch straight up and potentially escape like a jailbird.
Better players who can control their ball flight might get away with less depth, but even scratch golfers want that immersive feeling. Nothing kills the vibe faster than worrying about your ball escaping every time you grab a wedge.
Bottom line: you've done the homework on room size, factored in safety margins, and thought about who's actually gonna use this thing. Smart approach - now you're ready to pull the trigger on the right setup.
Select the Ideal Screen Shape for Your Setup

You're probably thinking a projector's aspect ratio is just a fancy tech spec, right? Actually, it's what makes or breaks your simulator setup – it controls whether your golf swing footage fills that impact screen perfectly or leaves you with those annoying black bars on the sides.
Here's where most folks mess up: they grab a 16:9 projector thinking, "hey, that's what my TV uses!" But hold up – your garage or basement might have different ideas about what'll actually work.
Let's talk 4:3 first – yeah, the old-school TV shape. This bad boy gives you tons of headroom for your driver swing without needing a warehouse-sized space. That extra vertical room means you won't clip the ceiling on your follow-through. It's why tons of home setups rock this ratio, especially when you're squeezing a sim into that spare bedroom.
Now, 16:9 looks gorgeous – we're talking crystal-clear HD visuals that'll make you feel like you're actually standing on Augusta's 12th tee. But here's the catch: you need at least 14 feet of width to make it work properly. Got that space? Sweet. Working in a narrow room? You might want to keep reading.
The 16:10 option splits the difference nicely. Think of it like your laptop screen – wider than the old 4:3 but not as stretched as 16:9. It's perfect when you've got decent width but can't quite pull off the full widescreen setup.
Square screens (1:1 ratio) exist too, though they're kinda like using a pitching wedge for every shot – it'll work, but it's not ideal. You'll see those black bars more often, and honestly, it feels weird watching your ball flight on a square screen. Still, if your room's basically a cube, it beats not having a SIM at all.
Here's something cool: you don't have to stick with standard sizes. Got a weird-shaped room with that annoying support beam? Custom screens can work around it. Maybe your ceiling slopes or you've got pipes running where they shouldn't – a custom setup maximizes every inch you've got to work with.
The thing is, going custom means your projector won't match up perfectly with your screen dimensions. No biggie though – you'll just see some unused space around the edges. Way better than compromising your swing space or safety zone.
Pro tip: always go with the biggest enclosure that'll fit your space safely. And here's something that trips people up – when manufacturers list an "8 x 8 x 5" setup, the actual screen dimensions are bigger than you'd think. That 8 x 8 usually means the full enclosure measures 100 x 100 inches, not the 96 x 96 you'd expect.
Bottom line? Pick your aspect ratio based on your room, not what looks coolest in the online photos. A 4:3 setup that fits perfectly beats a cramped 16:9 any day. Your scorecard won't care if you're using "old" technology when you're dropping strokes left and right from all that practice time.
Final Step – Make Your Enclosure Selection with Confidence
You've done your homework - measured your space, figured out the clearances you need, and picked the right screen shape for your setup. Time to pull the trigger on that Golf Simulator Enclosure Size that'll fit like a glove. Ensure that your enclosure not only meets your desired dimensions but also accommodates the rapsodo mlm2pro space requirements. This is crucial for optimal performance and accurate readings during your practice sessions. Taking the time to verify these details will set you up for countless hours of improvement and enjoyment.
Here's the thing - at Golfers Authority, we can dial in your simulator and screen measurements right down to the inch. That means you're not settling for "close enough" when it comes to making this thing work in your garage or basement.
Just keep this in mind: you can't mess with just one dimension. Say you need to drop the height by a foot because of that low ceiling - the width's gotta shrink too. Otherwise, you'll end up with a stretched image that makes every shot look like you're playing through a funhouse mirror.
The sweet spot? Getting your screen to match what your projector wants to show. When those aspect ratios line up, you'll use every pixel without any of those annoying black bars eating up screen space. It's like the difference between watching the Masters on a properly set TV versus your buddy's stretched-out screen that makes everyone look like they've been hitting the gym way too hard.

Paul Liberatore
As the Founder of Golfers Authority Paul Liberatore Esq. has spent the last 7+ years writing about the best golf equipment or instruction from the top golf instructors in the world. He has been a contributing writer for Sports Illustrated Golf and GolfWRX. After graduating with honors from Purdue University, he realized that he had a passion for the golf business and the law. When he's not practicing law, or creating golf content on YouTube, he can be found on his syndicated Behind the Golf Brand podcast talking with the most prolific leaders in the golf industry.