Creating a DIY projector screen requires careful consideration of three key factors: budget, space constraints, and personal preferences. There are three main options to choose from: building a fixed screen frame, attaching a finished screen edge, and using a wall-hanging kit. Each method has its pros and cons, and the right choice will depend on the specific needs of the room.
Choosing Your DIY Screen Method
Building a projector screen yourself can save you money and give you a level of customization that's hard to find in pre-made screens.
To make a screen that meets your needs, it's vital to research your options. Consider the space where you'll put the screen, what you'll use it for, and what type of image quality you want.
This research phase will help you decide which DIY method is best for your situation. Each method has its pros and cons, including varying costs, complexity levels, and customization options. Factoring in these considerations will help you select a method that you're comfortable with and that produces a high-quality screen.
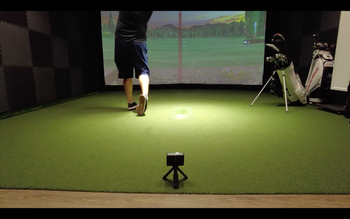
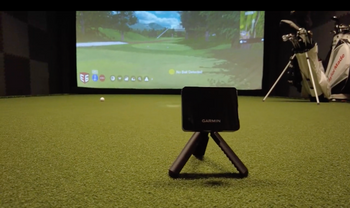
For example, if you're building a home golf simulator, you'll want to choose a method that can handle fast-paced video and precise images. You may need a screen that can also handle ambient light or different viewing angles.
Determining your requirements will lead to a more informed decision and ultimately a high-quality projector screen that will meet both your functional and aesthetic expectations.
Building a Fixed Screen Frame
Building a fixed screen frame is critical in creating a killer DIY projector screen. A solid foundation for the screen surface is essential to prevent the whole thing from falling apart.
Cutting four pieces of lumber to the perfect dimensions is the first step. This step cannot be skipped as it determines the aspect ratio and screen size. A measuring tape is necessary to get accurate measurements.
Assembling the frame using screws or nails is the next step. The frame must be sturdy and square to ensure a rectangular shape with a flat surface. A wonky frame will result in a poor projector screen.
Once the frame is built, attaching the screen surface can begin. A smooth, even surface is necessary for maximum image projection. This step is crucial and should not be skimped on.
A well-built frame and screen surface will result in a seamless viewing experience. The difference between a DIY projector screen and a store-bought one is significant. A flimsy frame will lead to a subpar viewing experience, which is undesirable.
The foundation of the projector screen is critical to its overall quality. A solid frame is necessary to ensure a great viewing experience. Without it, the projector screen will not function optimally.
Attaching a Finished Screen Edge

A finished-edge screen is the key to a professional-grade projector setup. Most people don't want a sloppy, raw-edged screen ruining the ambiance of their home theater or presentation space. Finished-edge screens with fixtures and grommets are more expensive, but the investment pays off.
When attaching the finished edge to an existing frame, it's essential to follow the manufacturer's instructions to the letter. Attention to detail is vital. The result is a seamless integration that elevates the entire projector setup. A well-crafted finished edge can make or break the visual appeal of a projector screen.
Many DIY projects fall short because the builder skimps on this crucial detail. A finished-edge screen is the crowning glory of a DIY project, and it's a game-changer for movie nights, presentations, or gaming marathons. Taking the time to do it right rewards you with a setup that rivals commercial cinemas.
The finished edge is the unsung hero of a top-notch projector screen. It's an investment you won't regret. A projector screen with a finished edge can transform a room into a home theater or a professional presentation space. With its sleek and polished appearance, it's an essential component for anyone looking to create an immersive viewing experience.
Using a Wall Hanging Kit
Wall-hanging kits for projector screens offer a sleek, modern appearance and streamlined installation process. A typical kit includes a pre-assembled frame, hooks, and screws, making it perfect for those short on time or lacking DIY experience.
Verifying the kit's dimensions match your space before purchasing is crucial to avoid installation headaches. Following the manufacturer's instructions ensures a professional-looking setup that enhances your viewing experience.
The balance between aesthetics and ease of use is achieved through the kit's design. By considering the space and following instructions, you can create a visually appealing and functional projector screen setup.
Tips for a Perfect Installation
When it comes to setting up a home theater, positioning the screen is key. To get it right, I meticulously measure the space to ensure the screen is large enough for the room without overwhelming it.
The projector's throw distance and desired viewing angle play a huge role in determining the perfect mounting height and position. I recall a recent installation where the client wanted a 120-inch screen, but the room's dimensions and seating arrangement made a 100-inch screen the better choice. Considering these factors, we achieved a well-integrated installation that elevated the viewing experience.
Screen material and texture are also vital considerations, significantly impacting image quality. For instance, a screen with a high gain can enhance brightness but may compromise on viewing angle. I choose the right material and texture to ensure an optimal viewing experience.

Conclusion
Crafting a DIY projector screen for an in-home golf simulator transformed my gaming experience. The projector's soft glow filled the room, and my meticulous screen became a virtual fairway, teeing me up for an immersive game.
A well-designed screen is about more than aesthetics; it's about maximizing gameplay and analysis. By fine-tuning every detail, I created a space where I could focus on precision and enjoyment. The screen became the centerpiece of my golfing sanctuary.
Perfecting my DIY screen required a deep understanding of projector technology and screen materials. It wasn't just about hanging a white sheet on the wall. I leveraged my knowledge to create an unparalleled gaming experience that still impresses fellow golf enthusiasts.
My DIY projector screen is an extension of my passion for golf. It has enhanced my game, allowing me to analyze every swing and putt with precision. The screen's functional design and sleek appearance make it the crown jewel of my in-home golf simulator. I couldn't imagine my game without it.
This setup lets me refine my skills in a controlled environment. The projector screen's high-definition display and precise calibration help me examine every detail of my game. By optimizing my DIY screen, I've taken my golf game to the next level.


